ReNamer:Adding files and folders
In this section, we will see how to place files and folders in ReNamer's working area (also called the Files pane).
This consists of:
- Adding files and folders,
- Removing some files from the pane, and
- Changing the order of files in the pane.
ReNamer has multiple methods for these actions, as described below
Adding files using the 'Add Files' button
- Press the
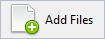 button. The following window pops up:
- Navigate to the required folder and select files.
- Press OK. The selected files are added to ReNamer's Files pane.
- Repeat steps 1-3 to load files from other folders (as required).
Adding items using the 'Add Folders' button
- To add all the files belonging to a folder, press the
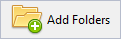 button.
- The following window pops up:
File:Browse.png - When you select a node in the tree, all its sub-nodes are automatically selected. In other words, when you select a folder, its subfolders are automatically selected.
- You can select any node from the tree. This includes all drives on your computer!
- You can select multiple nodes at a time, by pressing CTRL first and then cliking on different nodes of the tree. All those nodes will be added at one stroke.
- If you want to add only certain items from the selected folder, set ReNamer's Filters by clicking on the File:FilterSettingsButton.png button and then selecting different options. Depending on your selected options in this window, the Add folders window will add different items to ReNamer's Files pane.
- You can also set the filters by clicking the
 button (located above the Files pane)
- You can also set the filters by clicking the
- Navigate to the desired folder and press the File:AddFolderButton.png button.
Adding files using the Drag-and-drop method
Select the files in any application and drag-and-drop them into ReNamer's Files pane.
- To drag-and-drop, click on your file selection with LMB. Without releasing the LMB, start moving the mouse. Now bring the mouse pointer over the ReNamer's Files pane, and then release the LMB.
- If the ReNamer's window is not visible, first drag your selection onto ReNamer's task button File:ReNamerTaskbarButton.png in Windows Task toolbar (located at the bottom of your screen). Wait for a couple of seconds without releasing the LMB. The ReNamer window pops up, and stays above the other applications' windows on your screen. Now you can move your mouse over the ReNamer window and drop your selection in its Files pane.
- You can also use the ReNamer's General settings to keep its window above the other windows, so even when you are working in the other applications, the ReNamer window stays on top of the other applications' windows.
Adding files using the copy-and-paste method
Select the files in any application and press CTRL+C to copy them into the clipboard. Now switch to ReNamer and press SHIFT+CTRL+V.
Note that:
- Renamer does not use the usual keyboard shortcut CTRL+V.
- It is not necessary to click inside the Files pane for the paste operation.
Removing files or folders from pane
If you have added more files by mistake, you can remove them easily in just two steps:
- Select the items
- Press the DEL key. (This only removes the files/folders from the ReNamer. It does not delete them from the disk!)
Changing the order of the files in the pane
Certain rules (e.g. the Serialize Rule) act on the list of the files in "from-top-to-bottom" order (as opposed to acting on each file independently). In such cases, each file gets its name based on its position in the list. (For example, the nth file in the list is named Track-n.mp3.)
Normally, the files are listed in the order you added them to the pane (the most recently added file goes to the bottom of the list). But you can change the position of the files in the list.
Just click on the file and drag it to the new position.
- You can select multiple files and drag all of them as a group to the new position.
Sorting files in the files pane
You can also sort files in the Files pane by any column with just a click on the column title. The little triangle will show up to indicate the order of sorting.
Selecting files
When a file is selected, its entire row is highlighted with blue background.
| Selected file | File:SelectedFile.png |
| Unselected file | File:UnselectedFile.png |
ReNamer allows you to carry out specific operations on selected files.
You can select one or more files by the following methods:
- Click anywhere in the row except on the check box.
- To select non-adjacent files, press CTRL and then click on individual rows.
- To select files listed in adjacent rows, first click on the row at one end, then keep the SHFT pressed down, and click on the row at the other end.
- Draw a lasso (rectangle) with the mouse in the Files pane. All the rows touched by the rectangle are selected.
- If you repeat these actions on an item, they toggle the selection status (selected-unselected).
When only one row is selected, use Up/Down arrow keys to change the selection to another row.
Marking and Unmarking the files
A file is marked by putting a tick in its check box ![]() . Conversely, it is unmarked by removing the tick
. Conversely, it is unmarked by removing the tick ![]() .
.
ReNamer acts only on the marked files. An unmarked file is neither previewed nor renamed.
So unmarking a file is useful to exempt a file from renaming, without having to remove it from the Files pane.
To mark/unmark the files:
- Click on the check box.
- Select the files and press the Spacebar (on keyboard)
(Repeat of these actions on any item toggles its marked/unmarked status.)
Note that the marked/unmarked status of a file has no relation with its selected/unselected status.