ReNamer:Adding files and folders
Jump to navigation
Jump to search
In this section, we will see how to place files and folders in ReNamer's working area (also called the Files pane). This consists of (a) adding files and folders, (b) removing some files from the pane, and (c) Changing the order of files in the pane.
ReNamer has multiple methods for adding files and folders to its work area (the Files pane):
- The
 button adds only the selected files and subfolders in a folder. Use it to make finer selections.
 - The
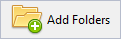 button adds all the files in a folder (i.e., bulk-selection). It also has filtering options to control what is added to the Files pane.
- Copy files/folders from Windows Explorer (or any other application).and paste them in ReNamer
- Drag and drop files and folders into the Files pane (from Windows Explorer or any other application).
You can build a collection of files/folders using any or all of these methods. In fact, you can use these methods multiple times. Further, you can change the Filter option for the ![]() button each time.
button each time.
The following sections show details of each method.