ReNamer:Rules:Translit

This rule transliterates Non-English characters from different languages into their English/Latin representation. For example, the German character ü can be transliterated to ue (the name Müller can be also written asMueller).
So, we create a pair of equivalent characters, like this: ü=ue
(Note that the right side of this equation has two characters. Any number of characters may be placed on both sides of the equation.)
We need several such equivalent character pairs to convert one language into another. An entire set is called a transliteration map. (This is really a character-level find-and-replace rule.)
ReNamer has several such built-in maps. Each map is named after a language (the second language in all maps is English).
Each map can be used in both directions (e.g. French-to-English or English-to-French.)
When you start up the Translit Rule, its window does not show any maps. You are free to do any of the following:
- Use any of the built-in maps (and use it in forward or reverse direction)
- Create your own map and use it.
- Edit a built-in map first, and then use it.
Let us see how to do this.
Using a built-in transliteration map
To select any of the built-in maps, press the ![]() button. A list of available transliteration maps pops up:
button. A list of available transliteration maps pops up:

Click on the desired transliteration map. As an example, let us click on the French (to English) transliteration map.
The Rules window changes immediately to show the French characters and their English equivalent.

You can edit any of the entry in this list, add new entries, or delete any of the entries.
Note that such editing does not alter the saved version of the map. (The map is edited just for a one-time use. So, if you select the same Translit map again, ReNamer will load the original version, not the edited version.) We will see how to edit and save a map later.
Next, select the rule's parameters as shown below::
| forward | This is transliteration from-left-to-right direction, as defined in the map. |
| Backward | This is transliteration from-right-to-left direction, as defined in the map. |
| Skip extension | If this check box is unselected, the extension will be included in the rule. |
Finally, press the ![]() button to add the rule to the stack.
button to add the rule to the stack.
Making your own transliteration map
Click in the Translit Alphabet window, and start entering the equivalent characters (one transliteration per line).
For example,
ü=ue
ö=oe
ß=ss
After entering all such transliterations, press the ![]() button to add the rule to the rule-stack.
button to add the rule to the rule-stack.
Note that this rule is not saved yet (it was just composed for a one-time use). The following topic shows how to save a map.
Saving a transliteration map
To save a newly composed Transliteration rule,
- Press the
 button.
- A menu pops up.

- Select the last option (Save Translit...).
- A window pops up, as shown below:
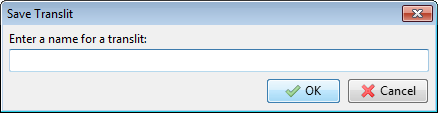
- Enter a new name for the map and press OK. The new map is saved.

The process to save an edited Transliteration map is similar. The only difference is that the Save Translit window (see above) shows the current map's name. You can press OK to save the changes you just made, or enter a new name to create a edited version of the current map.
The new map's name is added to the map list.
From now on, the new map will also be available as "standard".