Quick Guide
TODO: Finish the article, review, and updateUpdate links.
The workflow in ReNamer is a simple 4-step process:
- Add files or folders for renaming.
- Add renaming rules.
PreviewGenerate the new names.- Rename.
{IMAGE HERE}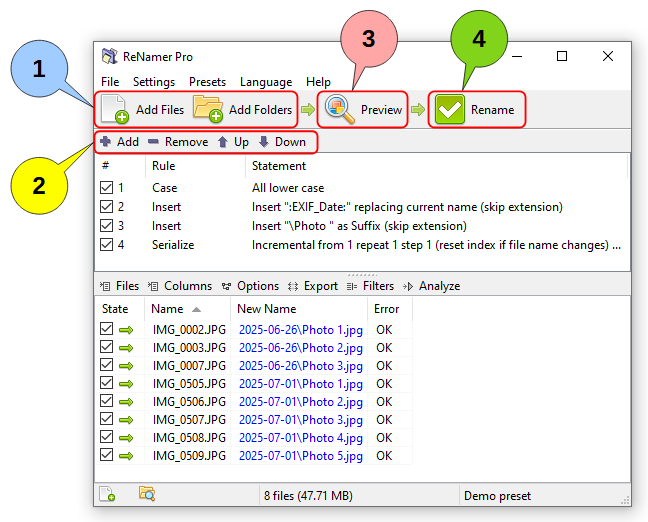
Step 1: Add files
SelectAdd individual files or whole folders for renaming using either the files from various folders and add them to the working area.
Optionally, adjust the filter settings to fine tune which files and folders get added, including depth criteria and filter masks.
Step 2: Add rules
Add rules to create a sequence of operations.operations Deletefor generating new names for files.
You can use the tool buttons or edit an existing rule. Change the ordercontext ofmenu theto manage rules, including adding, deleting, moving, and duplicating rules.
Your rule insets thecan stack.
Step 3: Preview
PreviewGenerate the new names and review the results (check before proceedingrenaming. withAddress any validation warnings.
Pressing the actualPreview renaming).
Step 4: Rename
Press thisthe Rename button to rename your files and folders,folders by applying their corresponding new names.