Quick Guide
TODO: Update links.
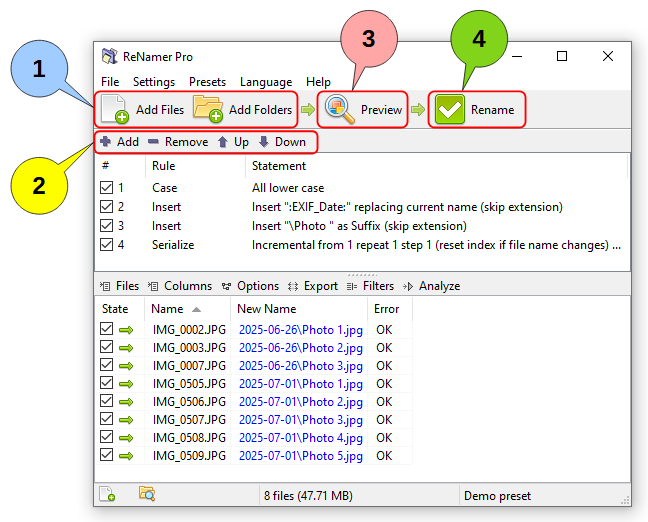
The workflow in ReNamer is a simple 4-step process:
- Add files or folders for renaming.
- Add renaming rules for generating new names.
- Apply rules to generate and validate new names.
- Rename.
Let's briefly go through the main steps below.
Step 1: Add files
Add individual files or whole folders for renaming using either the Add Files and Add Folders buttons, or simply drag-and-drop from Windows Explorer (or any other application) into the ReNamer window.
Optionally, adjust the filter settings to fine tune which files and folders get added, including depth criteria and filter masks.
Step 2: Add rules
Add rules to create a sequence of operations for generating new names for files.
You can use the tool buttons or the context menu to manage rules, including adding, deleting, moving, and duplicating rules.
Your rule sets can be saved as presets for future reuse.
Step 3: Preview
Generate the new names and review the results before renaming. Address any validation warnings.
Pressing the Preview button is optional if the auto preview option is enabled (default setting), which automatically generates new names when you change the rules or the list of files. Additional preview settings offer features like highlighting changed names and resolving conflicts.
Step 4: Rename
Press the Rename button to rename your files and folders by applying their corresponding new names.